
Tips on How to Photograph Your Products
General Rules of Thumb
- Natural, indirect, bright light is best. This might be a room in your house with lots of windows or a barn with the doors open. The light of early morning and early evening are great times to take pictures without the sun directly overhead.
- Leave space around your product. Clear the area around your product of any clutter, computer chargers, etc so that the only things in the frame are the product and the background. Make sure that you aren’t cutting off any area of your product–for example, if photographing a loaf of bread, make sure the entire loaf is visible and that the clean background is visible on all sides of the product. (there are some exceptions listed in individual categories below)
- Keep your background neutral. Most food items will look best when photographed on a cool-toned background (grey, white, blue or cool brown tones). Think wooden table or board (stay away from orange & yellow toned woods), a flattened brown paper bag (no logo showing),a piece of slate or granite, or white craft paper or poster board.
- Try different angles and take several shots of each product. Most food looks best shot from directly above with your phone or camera lens parallel to the surface you’re shooting. That said, certain prepared foods and beverages look better from the side or at an angle. Take a few shots of each product to see what makes your product look most delicious and to make sure you get a well framed, in focus shot.
- Make sure your phone/camera lens is clean. An out of focus photo will never do your beautiful product justice!
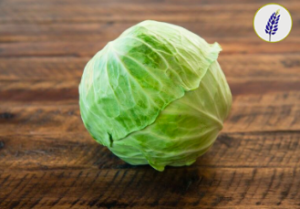
Tips for Produce
- Place a single vegetable or a small grouping of vegetables in the center of your frame and shoot from directly overhead or straight on. If shooting straight on make sure the background is clear of clutter or distraction.
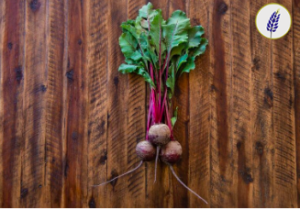
- If you sell a loose product like microgreens, salad mix, berries, potatoes, etc, try making a small pile of your product on your background or put it in a bowl or colander. If you package in a plastic box, or carton, try photographing it in the package with the lid removed/open.
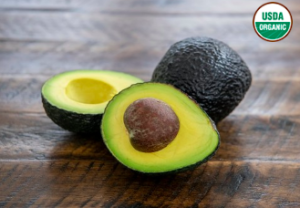
- Some produce looks great with a close up–for example a sliced open watermelon radish or a wedge of melon. Put the piece you want to feature in the foreground of your shot and create a background with the rest of that same product.
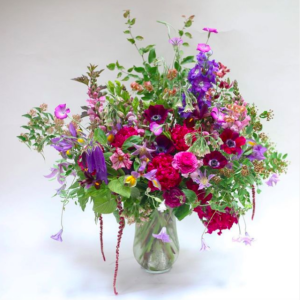
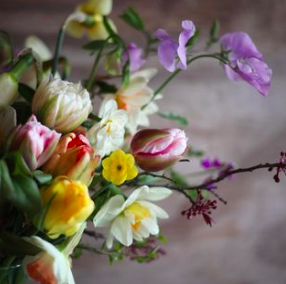
- Fresh cut flowers and bouquets are a good place to try at a 45 degree angle. Hold your camera or phone angled slightly down towards the arrangement and higher than the height of the bouquet. Remember to leave ample space in the frame around the arrangement and its container.
- You can also experiment with off-center framing to highlight a more close up view of your product.
Tips for Meat
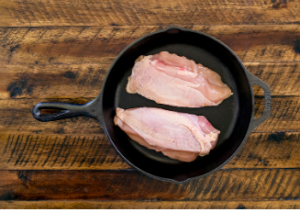
- Place uncooked product in a cast iron pan or a neutral plate or cutting board and shoot from directly overhead. If product is excessively shiny or wet, dab it lightly with a paper towel and photograph again.
- If shooting plastic-wrapped or frozen product, still shoot from directly overhead in bright, indirect light. Make sure the label on your package is centered in the frame and that there is space in the frame around all sides of the product.
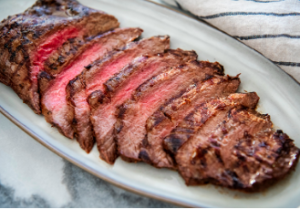
- Certain products may look better cooked–for example a pre-marinated meat product. Use the same general rules of thumb to shoot your cooked product. Good lighting is key for cooked product!!
- We generally do not recommend close-ups for meat products.
Tips for Prepared Foods
- If your product is a jam, dip, spread, or beverage center the product in the frame with plenty of space around it. Make sure the label is fully legible.
- If your packaging doesn’t allow the product itself to be visible (eg, a dip that is in an opaque plastic container), remove the lid of the container and shoot the product from directly above.
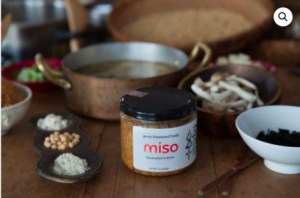
- This category also does well with a little staging. For example, a cheesemaker or cured meats producer might make a small cheese and/or meat plate featuring their product. A jam maker might photograph a nice plate of toast spread with their jam. Help the customer imagine enjoying your product in their own home. You can also stage a scene that shows the ingredients that go into your product like the one below.
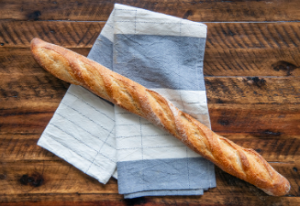
Tips for Baked Goods
- Breads, cookies, and other baked goods often look best photographed on their own, out of their packaging, from directly above.
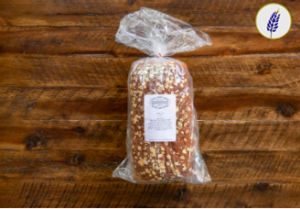
- If you are photographing a packaged product, (like granola) be sure the label is centered and fully legible and that there is plenty of space around the product in the frame. Try photographing the product straight on and from directly above with the package label centered in the photo.
- This category also does well with a little staging. Setting up a “breakfast scene” with a scone and a cup of coffee, for example, can help highlight your product.
Tips for Beverages
- Unless your beverage packaging makes it difficult to understand the product, photograph the bottle or jar straight on and level with the surface it is set on. Make sure any label or logo is centered and fully legible.
- If your product looks tastier poured into a glass, photograph a glass of the beverage next to the original bottle with the logo fully visible.
Tips for Dry Goods & Personal Care
- Most dry goods and personal care items are best photographed in their packaging, from above or straight on, with the logo/label centered and fully visible, and leaving plenty of space around the product in the frame.
- Exceptions to this might be spices and teas which can benefit from being photographed loose and/or close up so customers can see the quality and vibrancy of your product.